Do you notice your engine performance degrades gradually and is difficult to start? It happens due to many reasons, especially for a bad fuel pump. In this case, you need to replace the faulty pump with a new one. But the problem arises when attempting to change it. Luckily, this fruitful guide covers the DIY process of how to change a fuel pump.
Replacing or changing the fuel pump is effortless except for those who can’t know the ABC of the car’s functionality. With basic knowledge, even a fresher like you can perform this task. This project requires some necessary peripherals or tools, basic knowledge, and time.
Hence, to make the entire job easy and quick and eliminate further hassle, follow the tips ad tricks here. This helpful guide will bring peace of mind while working on fuel pump repair.
Steps to Change Fuel Pump with Tips: Be a Pro Today
Changing or reinstalling the old or damaged fuel pump isn’t an overwhelming or brainstorming task. This simple DIY task can be handled by yourself if you take the right measurement into account. So here is a step-by-step guide you need to follow.
Step 1: Tools You Need
Necessary tools are required to complete any project to get the job complete smoothly within a short time. Without the right tools for the specific project, you end up with a great loss, loss of time and effort. When it comes to changing or replacing the fuel pump on your car, ensure you have the following tools near you.
- ½” breaker bar;
- ⅜” ratchet wrench with a universal joint;
- An impact wrench;
- Open-end wrenches
- Flat-head, pocket, Phillips head, and small Screwdriver or hose clamp pliers;
- Angled pliers;
- Side cutters;
- Needle nose pliers;
- Vice grips;
- 14 t-handle;
- 14mm socket and swivel;
- Zip ties;
- Transmission jack (not necessary for all makes and models);
- Safety goggles;
- Hand gloves, etc.
Note: What tools you need varies from car to car. Hence, make sure you check the owner’s manual or take advice from a professional.
Tip: The impact wrench is a great tool to retighten or loosen the bolts or nuts. So don’t forget to make it yours for this DIY project.
Step #2: Prepare the Vehicle
This includes turning off the vehicle, keeping it a safer place, lifting the vehicle with a transmission jack (optional for some vehicles), etc. However, without ensuring whether the car is completely stopped or not, don’t go for the next step. Thoroughly check the condition of a car.
Caution: Don’t put your hand in the fuel tank if you just stop the car. Your hand could be burned.
Step #3: Remove the Fuel tank
In the very next step, you need to remove the fuel tank to clean it. To remove the tank, lift your car with a transmission jack or jack stands. For clamping the hose, a Phillips screwdriver is necessary. However, use a breaker bar to loosen the nuts and then use impact wrenches to remove the fuel tank. Afterward, disconnect the fuel lines and slowly remove the tank to get easy access to the fuel pump.
Caution: Remember to weather safety glasses to protect your eyes during the fuel tank replacement session. Otherwise, the rust attached to the tank could damage your eye. For maximum safety, it’s best practice to disconnect the battery.
Tip: Lifting the car with a transmission jack instead of a jack stand or floor jack will make the ask lot easier. This is why using the transmission jack to get complete access is a fantastic option. Before lifting the car with ground jacks stands or transmission jacks, don’t forget to follow the owner’s manual disclaimer.
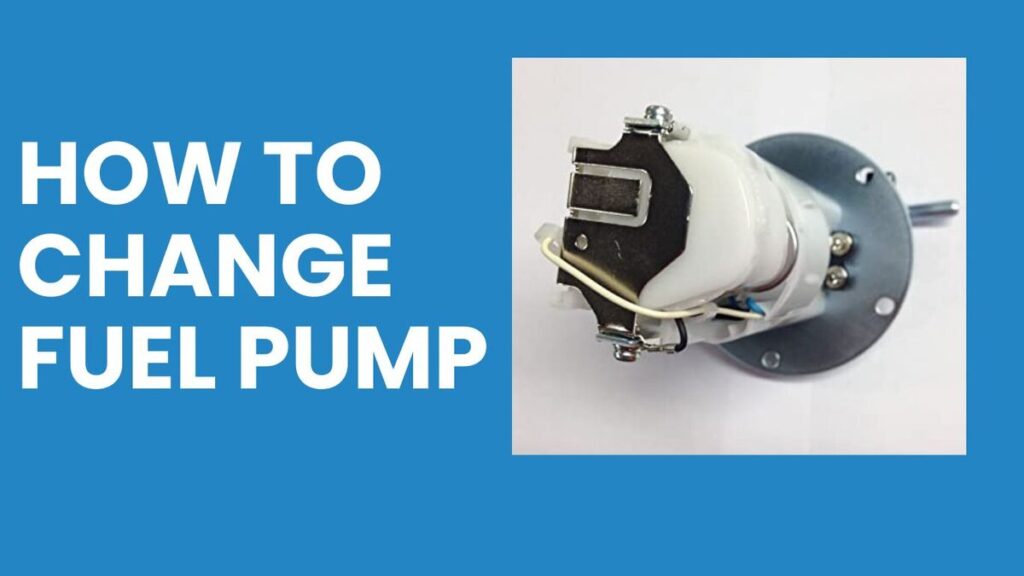
Step #4: Remove the Fuel Pump
After removing the tank, you now go for the fuel pump removal process. Note that this process varies from car to car. The way you can remove pumps from the fuel-injected vehicles, you can’t go through the same process for carburated engines.
In general, you need to disconnect the electrical connector. Then, loosen the clip that holds the fuel lines to free the fuel lines. Take the Phillips head screwdriver to remove the screws on top of the fuel tank. After removing the screws, carefully remove the whole fuel pump assembly.
Then, remove the fuel filter or fuel strainer. After that, remove the rubber line located on top of the pump attached to the sending unit. By doing this, you can easily get out of the pump.
Tip: If you face trouble clearing out the rubber tip or line, cut it off, especially when dealing with Mazda.
Step #5: Inspect the Pump Deeply
After ending the removal process, now check if the fuel pump completely destroyed or have some good parts. Also, you can compare the defective one with the original or new one. If you see there are lots of problems and dissimilarities between good shaped and bad shaped fuel pump, in a hurry for replacement.
Step #6: Install the New Pump
Once identifying the fuel pump failure, install the new pump. It’s easy than removing. You need to go reverse the removal process. However, the modern pump comes with a built-in adapter connector to make the connecting peace of mind.
Take the piece of rubber clip and cut it to the right shape. Now, tighten the quarter inch by pushing it down hard. This way you can set the strainer right. Put the whole assembly into the exact place inside the tank and re-join the Phillips head screw. Complete the process by re-installing the fuel tank into the car.
Tip: Ensure the sending unit moves genuinely and freely. Otherwise, it can’t deliver or send sufficient fuel to the engine or other parts.
Conclusion
So here is an end to the DIY fuel pump replacement guide with tips, caution, and an overall concept. The fuel pump is arguably one of the critical components of a vehicle that directly connects to the performance. Without a tuned fuel pump, you can’t get even a good start, let alone a sophisticated performance. It can be damaged or failed due to some inconveniences. This is why you need to change it every now and then. We try to organize the replacement guide keeping the fresher in mind. We hope, this DIY step-by-step fuel pump replacement guide removes further hassle when dealing with replacement.
More resources: